Press the ON button on the UR monitor.
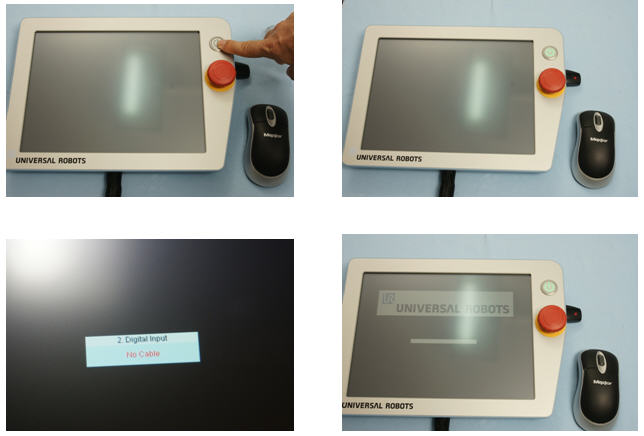
A messages appears that say “No Cable” –
Which normal and no actions are necessary for this.
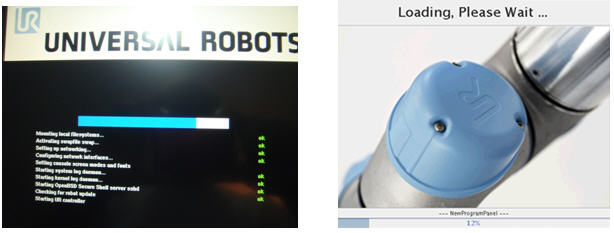
During boot you will see various screens loading and checks – this is normal and it takes 1 – 2 minutes to boot. You will also hear the fans turn in the controller box.
After booting the monitor will show one of these two screens depending on if the Emergency push button has been pressed.
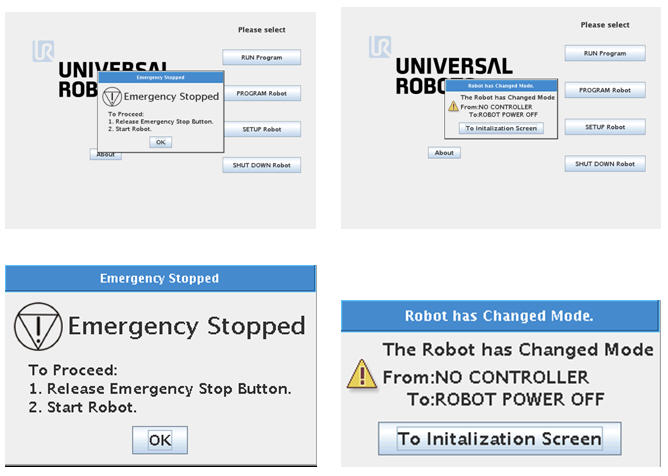

If the emergency messages are shown – then turn the red mushroom button clockwise.
Then press the “OK” on the screen.
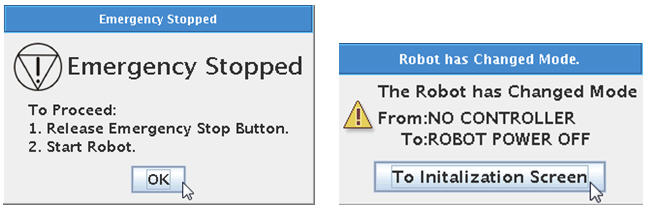
It is also possible to use the mouse and click on the OK or “To Initialization Screen”.
From this stage on and the rest of the manual a mouse click is used instead of pressing the touch screen monitor if not mentioned otherwise. (The mouse click or press with finger has the same result).
This will take you to the “Initialization” screen because at this point just after a cold reboot the robot does not know where the joints are situated. This also apply if the robot has been used and programmed before – after a cold reboot this initialization is necessary for the robot to find the position of the joints.
Notice that the screen say “Power OFF” and all six lamps for the joints are yellow. The controller has power ON of cause, but the robot is still Power OFF.
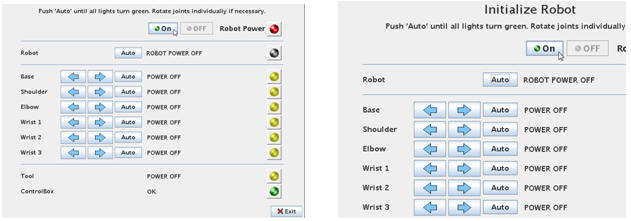
Press the “ON” button to turn on the power to the robot.
The status will go to “READY” for each joint, but the lamps are still yellow because the position of the joints is still unknown to the robot controller.
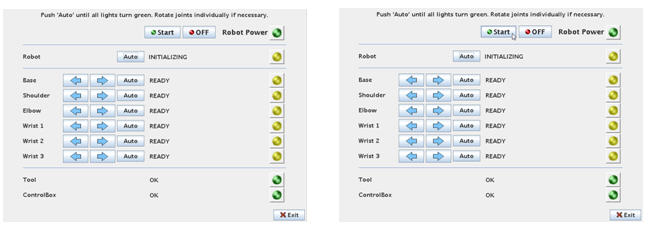
Press the “Start” button. You will hear six clicks – click – click – click – click – click which are the mechanical breaks inside the joints that are releasing. The mechanical breaks are use in transportation and after an Emergency stop to ensure the robot joints do not move.
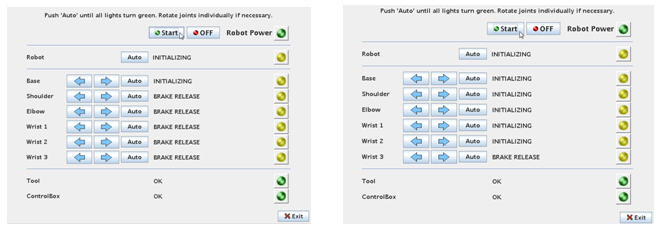
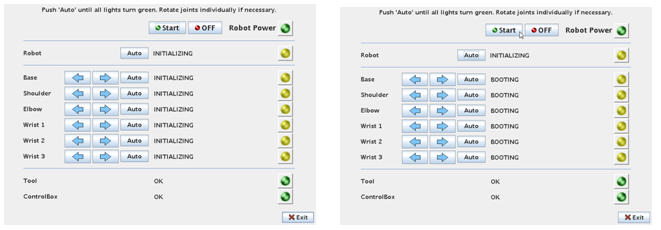
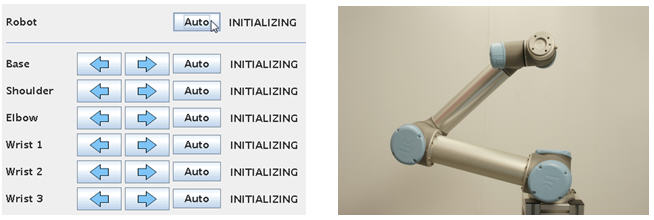
After a short time you will see the “BREAKE RELEASE” go to “INITALIZING” status for all joints. In some firmware version you will also shortly see the messages “BOOTING” for the joints
The robot does still not know the position of the joints and we have to help the robot on the way in order not to crash into something (including into itself) when the robot starts moving.
Because we have just unpacked and the robot is folded together in a tight position we will use a very controlled method this first time. Later we will see how a shortcut can be made when the robot is cold started for a position where the robot is fairly free and unfolded.
In this position we need to make sure the robot is moving “upwards” so it is not crashing into itself. If it crashes into itself it will stop with a safety stop, but the robot could be slightly scratched and we want to avoid that especially when it is new.
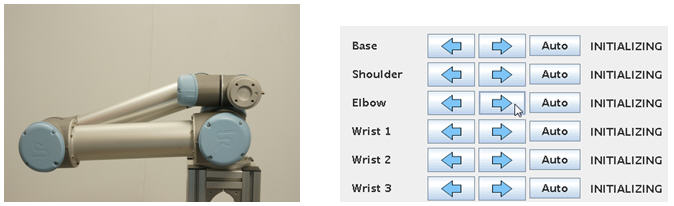
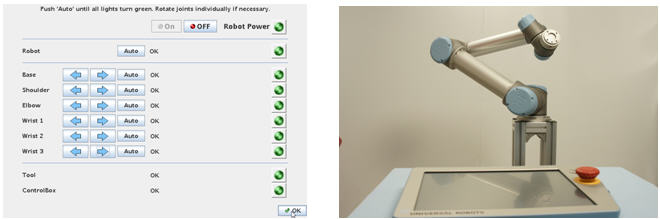
The robot is a 6 axis robot which means it has six joints and six axis freedom of movement. The joints are named 0, 1, 2, 3, 4 and five counting from the base – or with names it is Base – Shoulder – Elbow – Wrist 1 – Wrist 2 – Wrist 3.
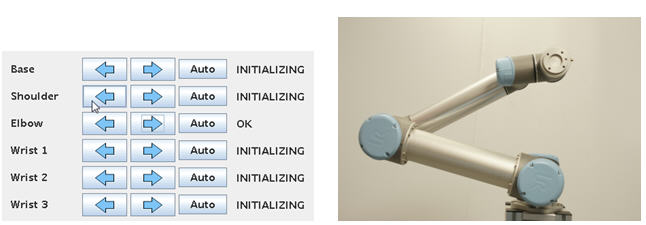
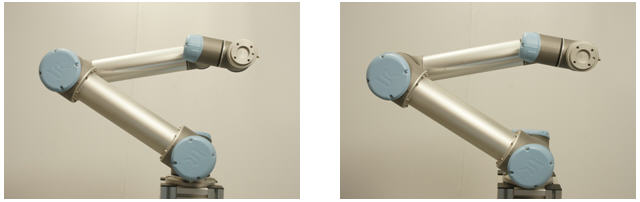
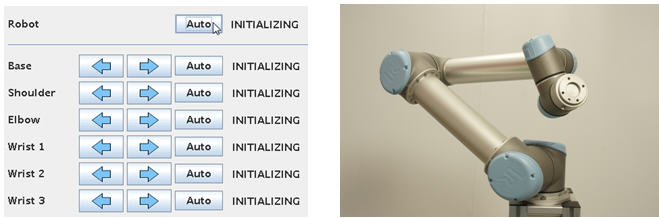
So in this case we want the elbow joint to move upwards to make the robot freer. So press and keep pressing the arrow pointing right – look at the photo at the right where to mouse pointer is placed.
Keep pressing and you will see the robot rise upwards.
After a few seconds the “Elbow” joint will report “OK” on the monitor. This means the robot now knows where this joint is positioned. It is not necessary to turn one full circle. What you see on the photo is normal.
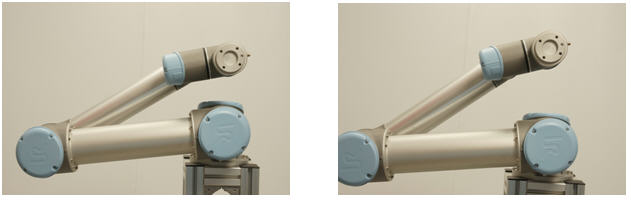
Now we want the “Shoulder” joint to move upwards in order to get the more upright and if turning down we might crash into the table if the robot sits on a table.
Press the arrow pointing to the left for the “Shoulder” joint.
You will see the robot move further upwards by the “Shoulder” joint movements.
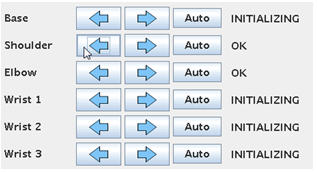
After a few seconds the “Shoulder” joint will also report “OK” and the position of the joint is now know to the robot controller.
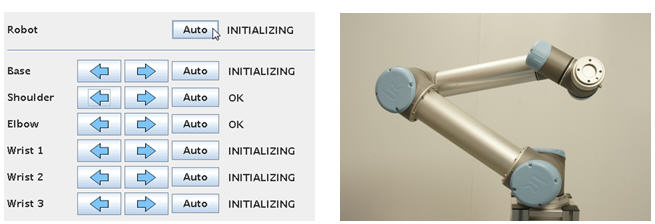
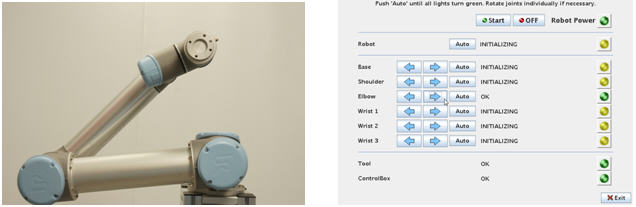
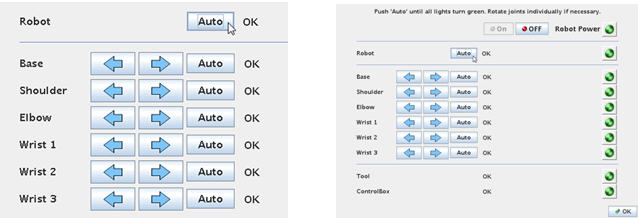
Now the robot is already quite good up and free so for the last 4 joints we will use a faster method. Press the “Auto” button on top of all joints where it says “Robot”.
Keep pressing the “Auto” button. Now notice how the remaining 4 joints all move until all of them say “OK” which means the robot has been Initialized and all joint position are know to the controller.
This “Auto” method is actually possible for all 6, but since the robot was folded we choose this controlled method until the robot had more space. We will try that very soon the second time we start up the robot.
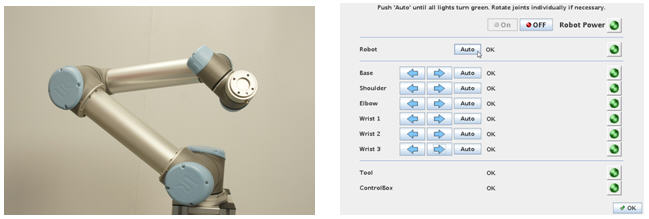
All the joints on the monitor reports “OK” and notice how all the lamps turned green. The robot is now initialized and ready to be programmed or load a program if we already have made a program before.
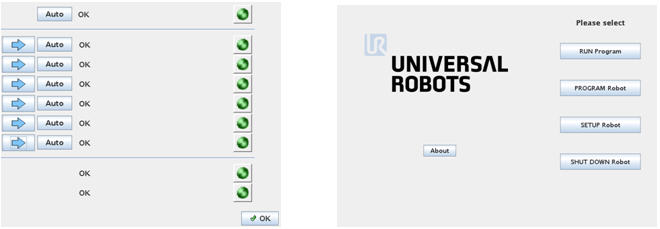
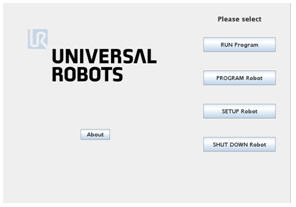
Press the “OK” button at the bottom of the screen which takes you to a Main Menu screen.
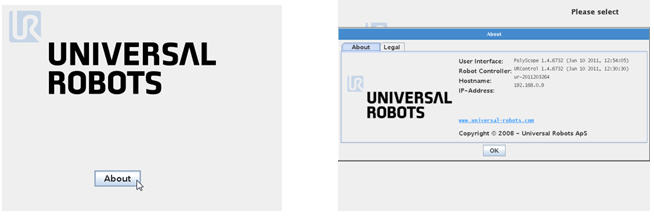
Try and press the “About” button. A screen with software version information appears and if an IP address has been assigned it is also shown in this screen. We will learn later how to set an IP address so this is properly blank on your screen.
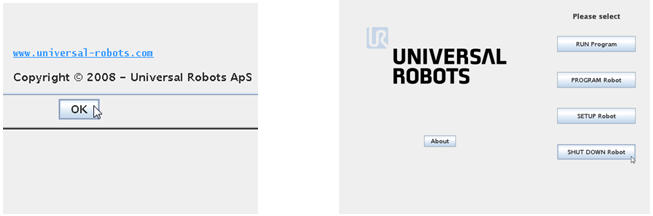
Press “OK” and you will return to the “Main” menu.
For training purpose the shortcut method for initializing the robot will be explained now because the robot is already up and free. So shut down the robot by pressing the “SHUT DOWN Robot” button.
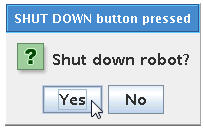
Confirm the Shutdown by pressing “Yes” button.
After a few seconds the robot and controller are turned off.
Notice how the six clicks could be heard because the mechanical breaks engaged to make sure the robot does not fall uncontrolled down to the floor.
Turn on the robot for the second time.

Turn on the robot again following the same procedure as explained above until you reach the “INITALIZING” screen.
Since the robot is up and free then press the “Auto” button on the top where it says “Robot”.
Press only briefly (0.5 – 1 second) and notice which direction the robot moves. Press again only briefly (0.5 – 1 second) and notice again which direction the robot moves. This is useful if the robot was power off near some obstacle or inside a machine – then we can control the movement direction during initializing because alternate press will cause the robot to go in opposite direction.
When you know the direction of movement you wish the robot to go during the initializing procedure then keep pressing until all joints report “OK”.
This time the initializing procedure went much faster and this will often be the choice of method during a cold reboot of the robot.
Press the “OK” button at the bottom of the screen to go to Main menu.
Disclaimer: While the Zacobria Pte. Ltd. believes that information and guidance provided is correct, parties must rely upon their skill and judgement when making use of them. Zacobria Pte. Ltd. assumes no liability for loss or damage caused by error or omission, whether such an error or omission is the result of negligence or any other cause. Where reference is made to legislation it is not to be considered as legal advice. Any and all such liability is disclaimed.
If you need specific advice (for example, medical, legal, financial or risk management), please seek a professional who is licensed or knowledgeable in that area.
Author:
By Zacobria Lars Skovsgaard
Accredited 2015-2018 Universal Robots support Centre and Forum.